This week, I decided to switch things up a bit. Instead of presenting both a recipe and a craft, I found myself immersed in two exciting creative reuse projects. As the season approaches, I'm still brainstorming project ideas featuring rub-on transfers for spring. Stay tuned for more inspiration, especially as you plan your Easter tables. Our latest DIY creation might just be the unique touch your table needs.
You might recall that people have been generously gifting me their discarded items. It seems I've gained a bit of a reputation for turning trash into treasure, and I must say, I'm embracing it wholeheartedly. I'd rather see these items find a new purpose than end up in a landfill any day.
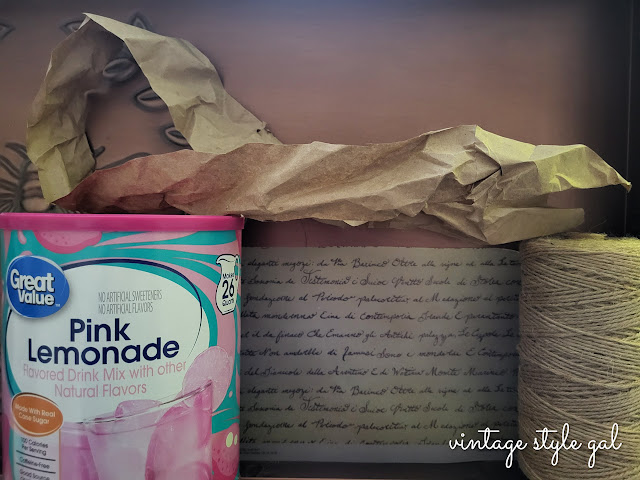
Recently, someone handed me a rather ordinary lemonade canister, mentioning that they thought of me before tossing it in the trash. Quite thoughtful, right? The inevitable question followed: What on earth will you do with it? A fair question, and I had an immediate idea.
Instantly, my mind drifted to pretty vases, as they are always on the back of my mind when it comes to giving items new life. DIY vases can be a fun way to add my own style to our home decor.
When I began giving our donated lemonade canister a makeover, I was leaning towards a spring-y floral pattern, but then thoughts drifted to a beautiful vellum scripted paper in my stash.
I don't know about you, but I love scripted items. There is just something about written word that makes me go all mushy inside. Add cursive writing to the mix, and I am a big ole' marshmallow thinking of the past, and those hand written letters sent back and forth over the miles.
Materials Needed:
- Canister rescued from the trash bin
- Scripted scrapbook paper or paper of your choice
- Hot glue gun
- Hot glue stick
- Cordless drill & 1/2 inch drill bit
- Rope
- Decor of your choice
Instructions:
- Begin by removing any residue inside. Normally, I would suggest running an item through the dishwasher, but since this piece is made from cardboard on the exterior, that was not possible. I handwashed this DIY canister with Dawn dish soap before getting started and letting it dry completely inside.
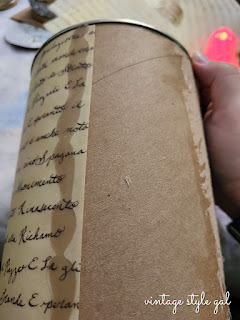
- Remove any paper covering the exterior of the canister
- Cut paper to fit height of canister. My paper did not reach around our DIY bucket, but I matched seams equal distance on each side.
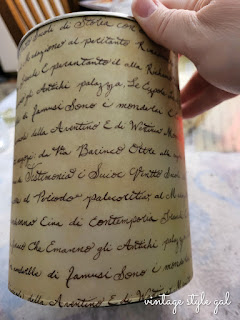
- Using your glue gun, apply a strip of hot glue along the pail, and apply paper, do the same to the other side so ensure all of the cardboard is covered by the paper of your choosing.
- Add twine around the bucket at the top and tie a bow on the front
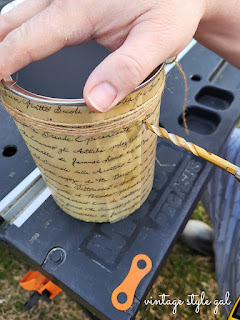
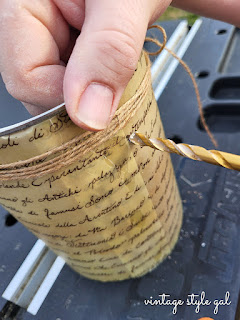
- (Optional) Drill two holes on either side where the seams match up
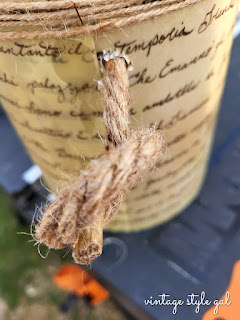
- Feed rope through the sides of the bucket, knot off the rope, and unravel the rope up to the knot on each side for a frayed look
- Decorate the DIY pail to your liking
Tips:
- Consider skipping Mod Podge if using vellum paper, as it may reveal the cardboard underneath. (I learned the hard way, and had to tear it apart)
- Drill holes before adding twine for the bow.
- Experiment with handle options; I opted for rope due to its sturdiness, but my mind went to our packing paper wreath hanger initially.
- Embrace seams if working with a larger piece of paper, or explore wrapping paper for a seamless look.
- I overlapped the paper to help in covering the glue showing through the vellum paper. Vellum paper is a translucent, smooth delicate paper.
- Scrapbook Paper - Amazon has scripted paper
- French Scripted Stamp - Amazon - you can create your own scripted paper in the colors of your choice by using a stamp
- Twine - Amazon
- Rope - Amazon
- Flower Bouquet - Amazon
- Dewalt Cordless Drill - Amazon - it's on sale now!
- Moss Eggs - Amazon
- Pearl Necklace - Amazon
- Eucalyptus Stems - Amazon
- String of Pearls - Amazon




So simple and so effective! I love everything about your DIY scripted bucket, Cara.
ReplyDeleteThanks Ann! I love scripted items, and this bucket turned out better than I thought it might.
DeleteThis is such a wonderful idea of using cannisters that would otherwise end up in the trash! I love the look of the scripted paper, and I especially love the idea of using the bucket as a hanging planter!
ReplyDeleteThank you Karalee! I have never had a hanging planter before, and I was so happy to be able to create one with a discarded item. So fun, and really makes me continue to be creative.
DeleteThis is such a great upcycle project! You are the queen of turning trash to treasure! You styled it so many cute ways, but I think the hanging basket is my favorite! Thanks for sharing your creativity!
ReplyDeleteTrash to Treasure projects are my favorite pieces to work on. It just shows with a little creativity, you can do so much, while making an impact on our environment. Hang on to all of those trash pieces, as many as you can! <3
Delete