Turning Trash into Treasure: A Detailed Journey of Creating an Outdoor Table with DIY Paint Techniques and Varnishing Tips
Join us on a candid and creative journey as we transform a discarded tabletop into a stunning outdoor centerpiece. Learn valuable lessons in paint application, sanding techniques, and the art of varnishing. Follow along as we hare the highs, the mishaps, and the triumphs of our DIY table adventure, proving that even a regular gal can breathe new life into old treasures.
Alright, are you ready to dive into the nitty-gritty? I'm laying it all out, no holds barred. Let's get candid because honesty is what we're all about here. I'm not here to claim the title of a professional blogger - I'm just a regular gal overflowing with ideas, someone who relishes sharing money-saving hacks, and who isn't afraid to get her hands dirty. When I see your comments, it warms my heart, knowing that there are kindred spirits out there like me.
Full disclosure: I've never considered myself a guru of blogging. I'm just a gal with a knack for thrifty ideas. I believe in being upfront - those ads you see? They're a necessary evil. To keep the fresh ideas flowing, I need a way to find the supplies. That's why they've found a spot here. So, without further ado, let's shift our focus to the star of the show: this incredible DIY Table.
Today, I'm pulling back the curtain on this table transformation journey. Now, I'm not a master of the craft; I'm merely a gal who seized an opportunity and learned some valuable lessons along the way, which I'm more than happy to share with you.
As you learn about my table tale, some of you might chuckle and think, "Well, everyone knows that!" But here's the deal - what might be common knowledge to some flew right past me or didn't quite stick. I figure, if I can help even one person avoid my pitfalls, it's a win.
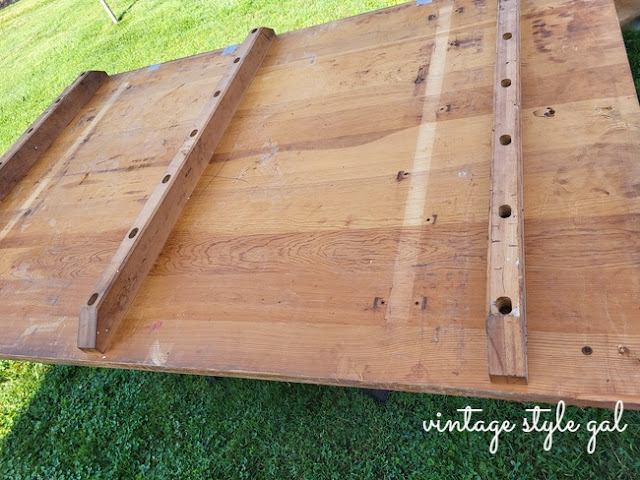
A few weeks back, I spilled the beans about how we scored this tabletop for FREE. I mean, can you blame me for doing a little happy dance? When my hubby brought it home, wrestling it from the truck to the garage was no small feat. It took a few weeks for it to find its home in the garage, waiting for the final pieces to fall into place. Hey gate, I'm looking at you - thankfully that project is behind us.
Let's not forget our enthusiastic pup who now yearns for ever waking moment to be spent outdoors. Honestly, I can't blame him. Sunshine has that effect. So, I thought, why not have a table to work at while he frolics in the yard, and I get busy with my projects?
My husband caught on (though I wasn't exactly hinting at it). He saw the potential in the tabletop, and the wheels in my mind started turning.
The first order of business was sanding down the tabletop. And by "we," I mean my industrious hubby, as I had to bow out due to my pesky inability to sand (thanks asthma!). Oh, how I miss that sensation of bringing surfaces back to life.
The underside of the table was our starting point. My husband meticulously sanded both sides, ensuring we had a smooth canvas before applying the varnish.
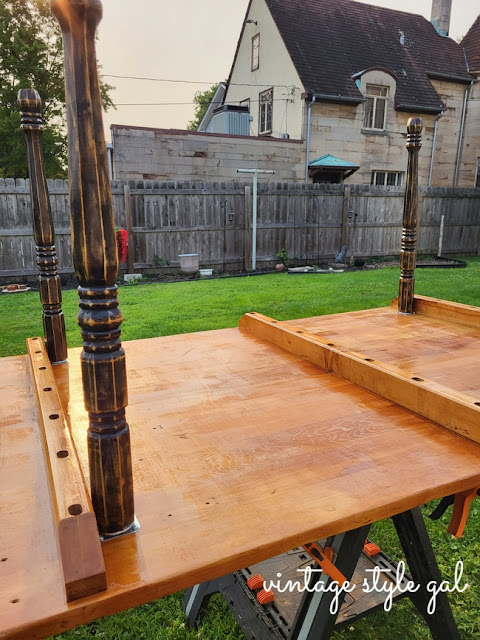
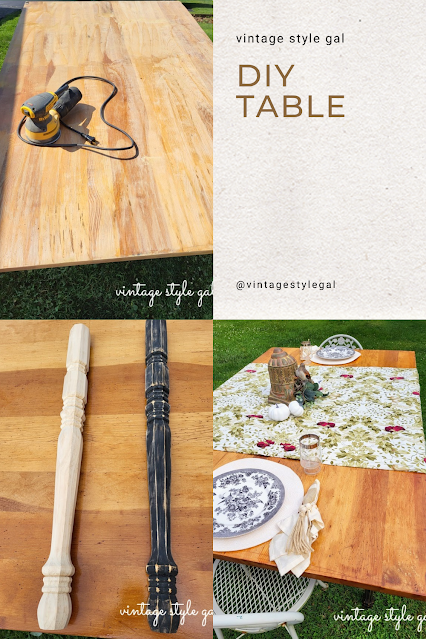
Now, let's zoom in on the table's top. My hubby employed a belt sander to banish those unsightly stains and old finishes. Then, out came the orbital sander, guaranteeing an impeccable smooth finish throughout.
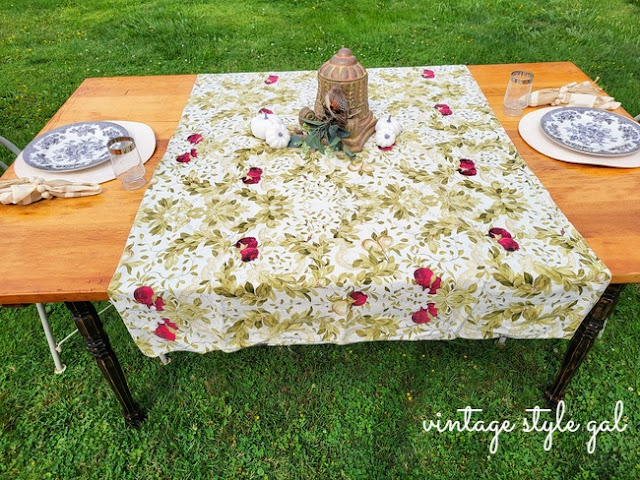
With the sanding complete, it was time to lavish some love on the underside. And here's a tidbit you might have picked up: this table was destined for the great outdoors. Yes, I envisioned dinner gatherings, laughter, and chats under the open sky, while our mischievous Bentley dashed around. Picture-perfect, isn't it?
I may sometimes use affiliate links, which means a small commission is earned if you make a purchase via the link. The price will be the same whether you use the affiliate link or go directly to the vendor’s website using a non-affiliate link.
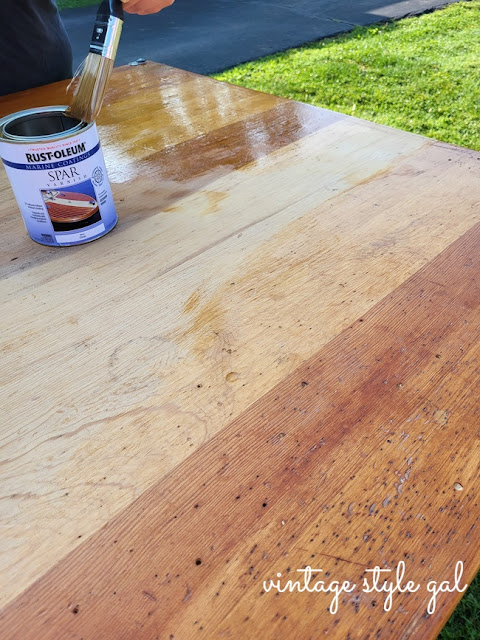
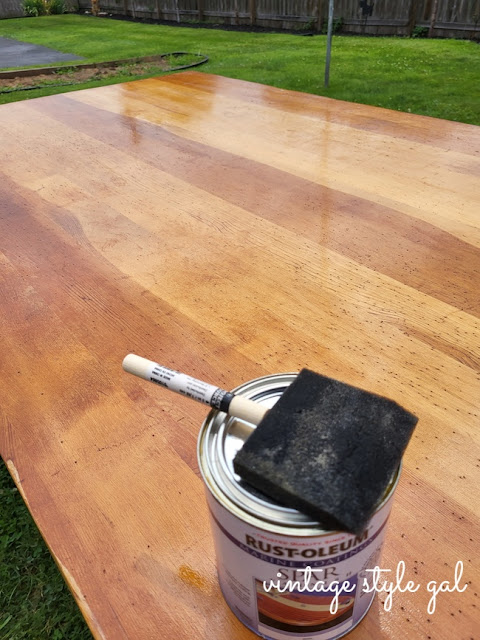
Considering Ohio's ever-changing seasons, we opted for Rust-Oleum's marine-grade varnish to shield our creation from the elements. Applying varnish was a meticulous process, hindered slightly by the humidity, which played havoc with drying times.
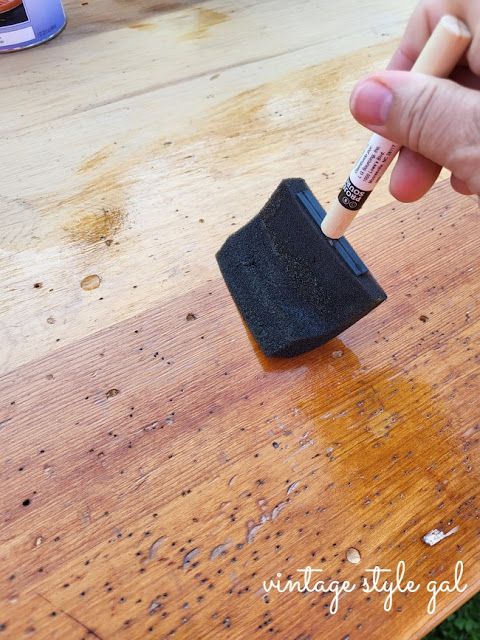
I leaned towards a sponge brush for a smoother finish, while my husband vouched for a traditional brush.
We made sure to give the underside two coats of varnish, while the top received a generous four. It might seem excessive, but Ohio weather is quite the character, and we want our table to stand the test of time.
Ah, the lessons I learned during this varnishing escapade! For those of you considering using this varnish (oil-based, by the way) heed my advice: steer clear of water. Yes, I had a little mishap. I mistakenly washed out my sponge brush with water, and let's just say the varnish wasn't thrilled about it.
If you find yourself in a similar sticky situation, a Clorox Bleach wipe will come to the rescue. Trust me, I've been down this road before, and it's a life-saver.
Impatience might be my middle name, but when it comes to varnish, patience is key. Allow each coat to dry completely before diving into the next one. Trust me, I learned this the hard way when I tried to varnish too soon. The result? A skiddy finish that was far from ideal. Thankfully, my vigilant husband intervened just in time.
Now, let's switch our focus to the show-stopping legs. These exquisite pieces were an Ace Hardware find from years back. Back then, I dreamt of a backyard table, long before the days of blogging dawned upon me. Funny how life's distractions can slow you down.
Real life, it turns out, often intervenes. I wonder how other bloggers manage to juggle it all? Truth is, we're weekend warriors, just like you. Asthma is sometimes a roadblock for me too, so sometimes I have to wait for my hubby's helping hand.
As I embarked on the leg-painting journey, I confess I was a novice. With a vision of black legs in mind, I quickly changed direction before I even got started. A newer look didn't quite suit the vintage tabletop, so I went down an aged paint finish journey.
Down the rabbit hole I went, diving headfirst into the unknown. While some turn to the internet for guidance, I prefer to figure things out on my own. Trust me, it's landed me in a fair share of predicaments (remember the varnish incident?)
Truth be told, I couldn't even wait for the paint to dry before my curiosity got the better of me. Despite the sticky leg, I couldn't resist a sneak peek into the future.
The first leg received a light touch of black paint, aiming for that coveted vintage vibe. But alas, my technique fell short.
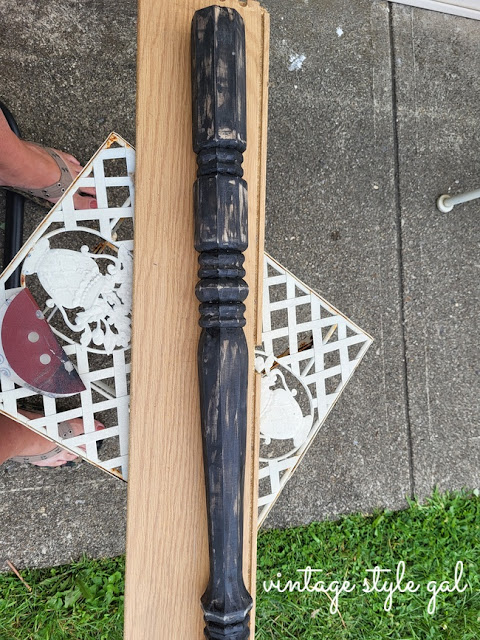
Frustrated, I layered on more paint, hoping to achieve the desired effect. It was time for a sanding intervention. Armed with sanding disks from the orbital sander, I meticulously stripped away the black high-gloss paint by hand.
Lesson learned: applying paint with a sponge brush yielded uneven results on my unfinished wood - except, it worked in my favor. You see, I'm a firm believer in learning through trial and error.
I adjusted my approach. Light-hand strokes were the key. Still, I wasn't quite capturing the essence I envisioned. That's when a memory from the past surfaced - a furniture makeover where we stripped away layers of paint to reveal the natural wood beneath.
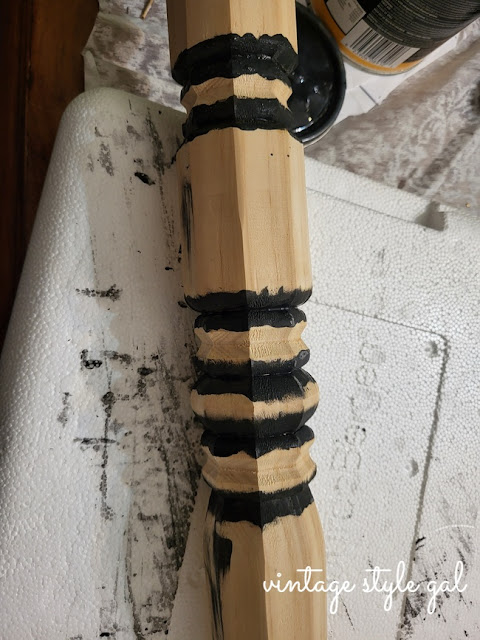
This cunning realization prompted a change in perspective. Instead of solely focusing on the surface, I started paying attention to every crevice and detail. I wanted to ensure that the paint nestled securely where it would naturally wear over time.
And so, I dove back in, meticulously applying paint into every nook and cranny. Then came the next phase - a careful dance between paint and sandpaper. Armed with the knowledge gained from our past furniture endeavors, I delicately sanded away paint from select areas, creating an illusion of weathered authenticity.
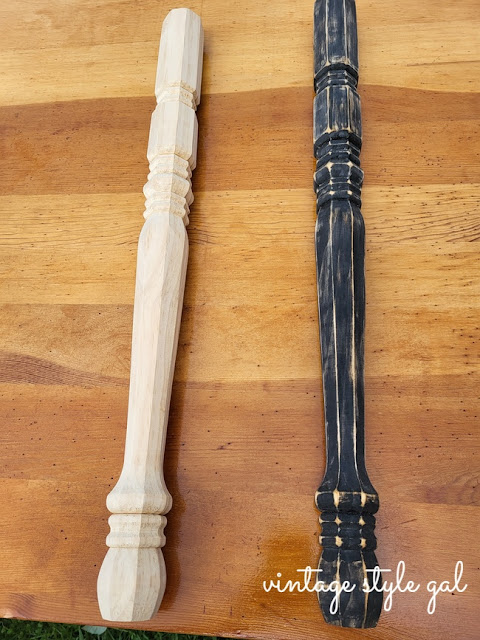
The transformation was staggering. A once-unremarkable leg had now metamorphosed into an artful relic, telling tales of years gone by. The difference was striking, and it fueled my enthusiasm to tackle the remaining legs.
Leg number two, my next canvas, received special attention. I focused on applying paint to the detailed crevices first. Why, you ask? Simple - these very areas are where the paint tends to have the most staying power, around those crevices it will endure countless nicks and scrapes which I will highlight soon.
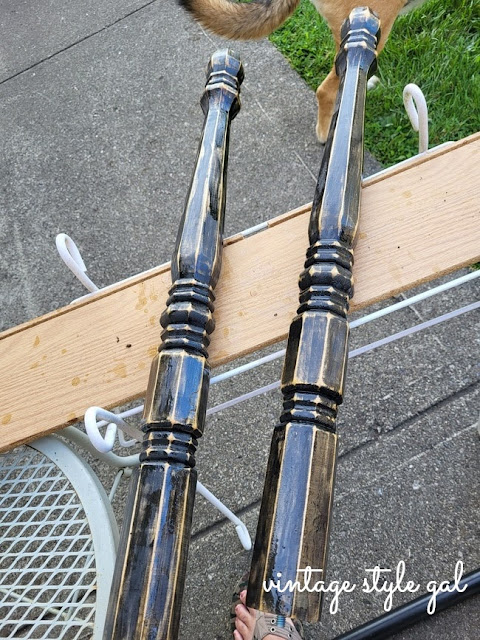
With the first leg as my guiding star, I crafted its companions. Each stroke was a step closer to achieving symmetry and unity, a testament to my determination and newfound skill.
The process wasn't without its trials. Progress was gradual, but persistence was my ally. Day one witnessed the completion of two legs - sanding and painting, sans varnish. As I surveyed my work, I marveled at the time and effort it took. It was a humbling reminder that the art of DIY demands dedication and patience.
Day two beckoned, and with it, a renewed vigor to complete the remaining legs. Hours melted into moments as I delved into my craft. The process was a delicate balance between speed and precision. As the last leg received its finishing touches, a wave of satisfaction washed over me. The quartet of legs, once all brand new and uninspiring, now stood as a testament to my evolving new skill.
Day three arrived, and the weather finally aligned with my aspirations. The varnishing process commenced once more, layering protection onto my newfound treasures. Yet, Mother Nature had her own plans a little later in the day - a thunderstorm disrupted my rhythm. Oh, the irony!
The legs deserved nothing less than diligent care. It was not merely a matter of protecting the surface; the legs' bottom's also needed safeguarding from the damp grass so each leg's bottom received several coats of varnish as well.
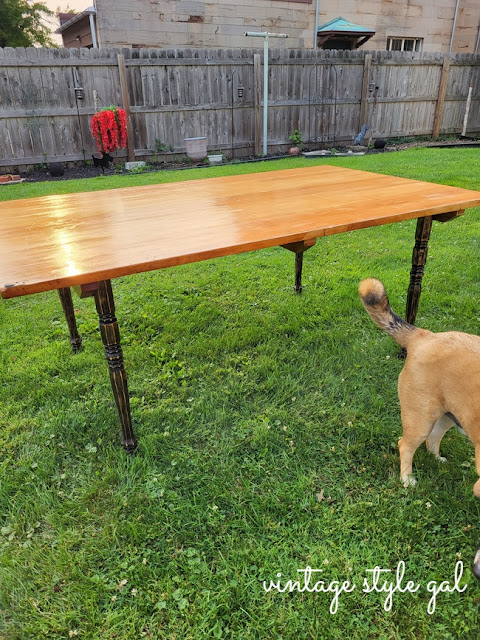
There you have it, a journey of reclamation, transformation, and discovery. What began as a discarded tabletop and a vision of an outdoor oasis turned into an intricate whirl of paint, sandpaper, and varnish. My DIY table became a canvas for learning, for unearthing hidden talents, and for overcoming obstacles.
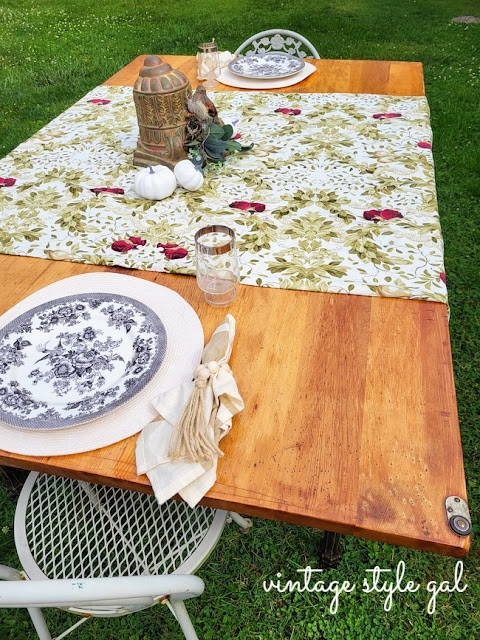
This DIY table reaffirmed my belief that embracing imperfections, even celebrating them, can yield unparalleled beauty. Our outdoor DIY table now stands proudly - a harmonious blend of seasoned wood, and carefully applied paint, each layer telling a story of growth and determination.
As I reflect on this project, I'm reminded of the beauty of creative learning - the notion that our mistakes are stepping stones to mastery. In the world of DIY, let this tale serve as a reminder: embrace the process, learn from your missteps, and above all, relish in the joy of bringing new life to old treasures. Your journey might just surprise you, revealing depths of creativity you never knew existed.
Don't Forget to Pin for Later!
Cara













Wow, what a transformation Cara! I love the black legs you have created for this beauty. You will enjoy this for many years to come.
ReplyDeleteThank you Wendy, I hope so. We are looking forward to figuring out a patio next, but are unsure on placement of it in our yard.
DeleteWow, Cara!!! I'm SO impressed!! The black legs are marvelous. These kinds of DIY projects are such learning curves, aren't they?! You will be able to love and use this for so many years. Amazing job!!
ReplyDeleteThank you Rachel, I really enjoyed this table project. I hope there will be more in the future for me to work on since I loved taking my time and seeing how it was going to come together.
DeleteGreat job Cara! Every time I paint or stain a furniture piece, I learn something new!! I love the black distressed legs on the table! I know you're going to enjoy your gorgeous new table!
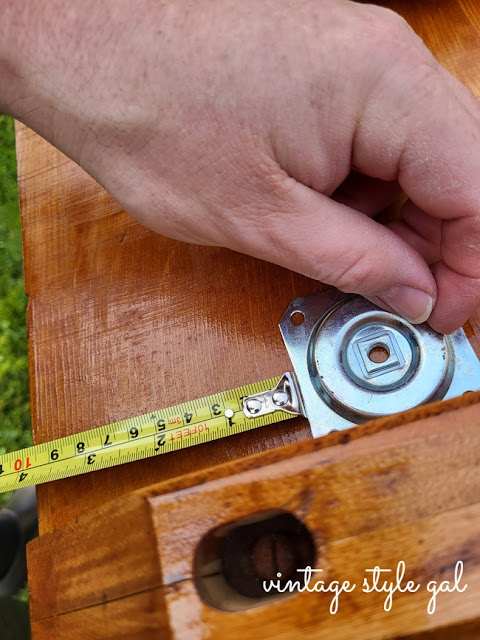
ReplyDeleteI can't wait to take the time to do a few projects at the table. I am in love with it and so happy with the way it turned out. Sad that the top was slated for the trash, but I was so happy to rescue it! We even left the metal piece on the top that was from the work shop it was in once upon a time.
DeleteOmgosh Cara!!! You make me laugh girl. Thank you for all the information, the good, the bad and the beautiful! It looks fantastic and you should be proud of yourself. I can't wait to see all the pretty tables you set. The legs turned out great and were worth all the learning curves. SO fun to see the amazing transformation! XO- MaryJo
ReplyDeleteI figured if I made some of these mistakes, others would too. I am not afraid to admit my mistakes, lol! If I would have taken the time to read the label, I would have known not to wash the sponge brush out. You should have seen my first run in with varnish, it was a hot mess! I had it everywhere and the more water I added, the more it became a mess. I tried washing my hands, and it kept getting to be a bigger mess so I figured out then it was oil based, teehee. Bleach wipes to the rescue! It was an accident I even figured that one out! I am looking forward to seeing your dresser!
DeleteYour table turned out beautifully! Your husband did a great job with all the sanding. (I imagine all the dust doesn't help your asthma). The legs also turned out great! Thanks for the great step by step instructions and photos. Also, thank you for linking up with the Home Imagined link party.
ReplyDeleteThank you Anna, yes, he does a wonderful job sanding. I sure do miss it though, it was one of my favorite things to do on new projects. Pulling back those layers sure are satisfying.
DeleteCara oh my word talk about a total transformation! This looks amazing. I love the varnish color you chose and the color of the legs as well. It doesn't even look like the same table. You guys totally nailed it! Hugs, CoCo
ReplyDeleteThank you CoCo. We believe it came from a school, it was a work table and has drill holes in it, but we filled those in with varnish to preserve it in the elements. We are looking forward to many nights under the sun and moon.
DeleteWow, this is amazing! Well done! Visiting from Crazy Little Lovebirds linkup.
ReplyDeleteThank you Jennifer, it was a learning experience for me. :) I enjoyed it, for the most part.
DeleteI'm very impatient (most definitely my middle name) so I can't take the time to do a project like this but it turned out nice for you!! Thanks so much for linking up at the #UnlimitedLinkParty 125. Pinned
ReplyDeleteThank you Dee, this table was a learning experience for me. I feel like the legs represent me, curvy and a bit weathered. teehee...
DeleteCara, this turned out beautiful. All that hard work put into this project was worth it. I love the color of the stain that you went with for the table. Thank you so much for visiting and linking this up at Crazylittlelovebirds link party!
ReplyDeleteThank you Stephanie, the table has been used quite a bit this summer. Our pup loves to lay under it to stay out of the sun, so it was worth it for him. lol
Delete